 Google Slides YOYO: PART 1 Activities Google Slides YOYO: PART 1 Activities
In the Activities Google Slides file:
- On the title slide, in a new Text Box enter the missing title information:
- Name of the speakers (your name)
- Date
- Place of the presentation: "The Obama Center for the Arts,Hayward, CA"
- Presentation sponsor: "Mt. Eden Health & Wellness Center"
- Go to the Grid view slide sorter.
- Click on slide 2 and drag it between slides 4 and 5.
- Click on Grid view in th View menu again or double click on slide 9.
- If you are not there already, go to slide 9.
- In the View menu, if it is not checked already, click on the Show speaker notes.
- In the t the bottom of the slide 9 page, where it says "Click to add speaker notes," type in "Take time to explain the pie chart."
- Go to slide 10.
- Select the word crunch.
- On the Insert menu click on Link.
- In the Insert Hyperlink dialog box,click on Slides in this presentation.
- Click on Slide 8: Sunday.
- Click Apply.
.
- Go to slide 8.
- From the Shape button select the shape Striped Right Arrow and place it onto the slide.
- On the Insert menu click on Link.
- In the Insert Hyperlink dialog box,click on Slides in this presentation.
- Select Last Slide.
.
- Click Apply.
- Add a new Title Only slide after slide 8.
 Type " Be Mindful" for the title. Type " Be Mindful" for the title.
- In the Insert menu, click on Video.
- In the Insert video dialog select My Drive, find, select and add the Mindfulness_Is.mov video.
- Make the video bigger and center it on the slide.
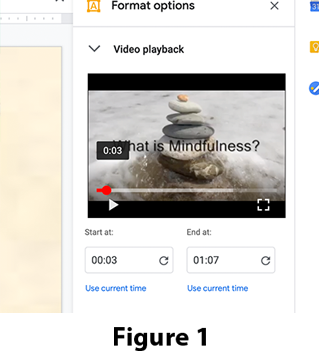
- In the Format options sidebar click to open the Video playback section and check Autoplay when presenting.
- Scrub (click on the red dot at the bottom of the video and drag it to the right) the play head of the video in the sidebar to the frame at 0:03 of the movie and click on Use current time under the Start at: section. See Figure 1 -->
- Go to slide 1.
- Use the New Slide button to add a new Title Only slide after slide 1.
- Type " WELCOME" for the title.
- In the Insert menu, click on Audio.
- In the Insert audio dialog select My Drive, find, select and add the Music.wav audio file.
- Make the audio icon bigger and center it on the slide.
- In the Format options sidebar click to open the Audio playback section and under Start playing select Automatically.
- Under Options set Volume when presenting to somewhere in the middle.
- Check Stop on slide change.
- Go to slide 11.
- Click on the Transition button.
- In the Slide Transition sidebar choose a slide transition, one that you like. You may want to set the speed which is 1 second to be faster.
- Click on the Apply to all slides button.
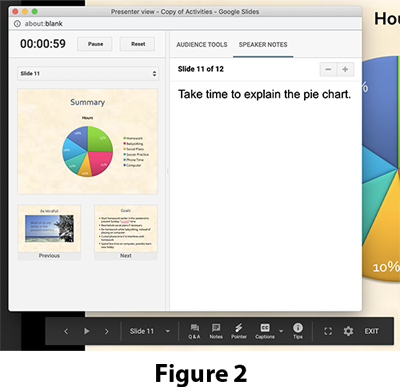
- Click on the arrow next to the Present button and select the Presenter view.
- In the Presenter view dialog you will see the elapsed time on the top left, under it the current slide, and under that the previous and next slide. To the right are the speaker notes that you typed in earlier. See Figure 2 -->
- NOTE: the pop-up presenters tool bar that appears at the bottom of the screen.
- In the Presenter view dialog use the pull-down menu, above the picture of the current slide, to go to the first slide, select: 1:Activity Log.
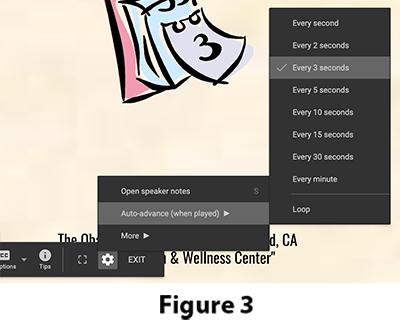
- On that tool bar click on Settings (gear symbol), Auto advance (when played) and select Every 3 seconds. See Figure 3-->
- On the tool bar click the play button.
- Where you able to read or take in all of the slides at 3 seconds each? You definitely did not get to see the whole mindfulness video! Think about how much time you really need to read a slide.
NOTE: this timing only applies to playing a slide presentation, normally in a live presentation each slide stays until you click to see the next.
- In the File menu select Print. In the print dialog box select the controls to print 4 slides per page.
- Click Cancel (DO NOT ACCTUALY PRINT!).
- Done. SAVE YOUR DOCUMENT.
|